As promised, today's tutorial is here to help actual and future Ubuntu 8.04 (Hardy Heron) users to install the latest AWN (Avant Window Navigator. We will offer two methods: from a repository and from sources.
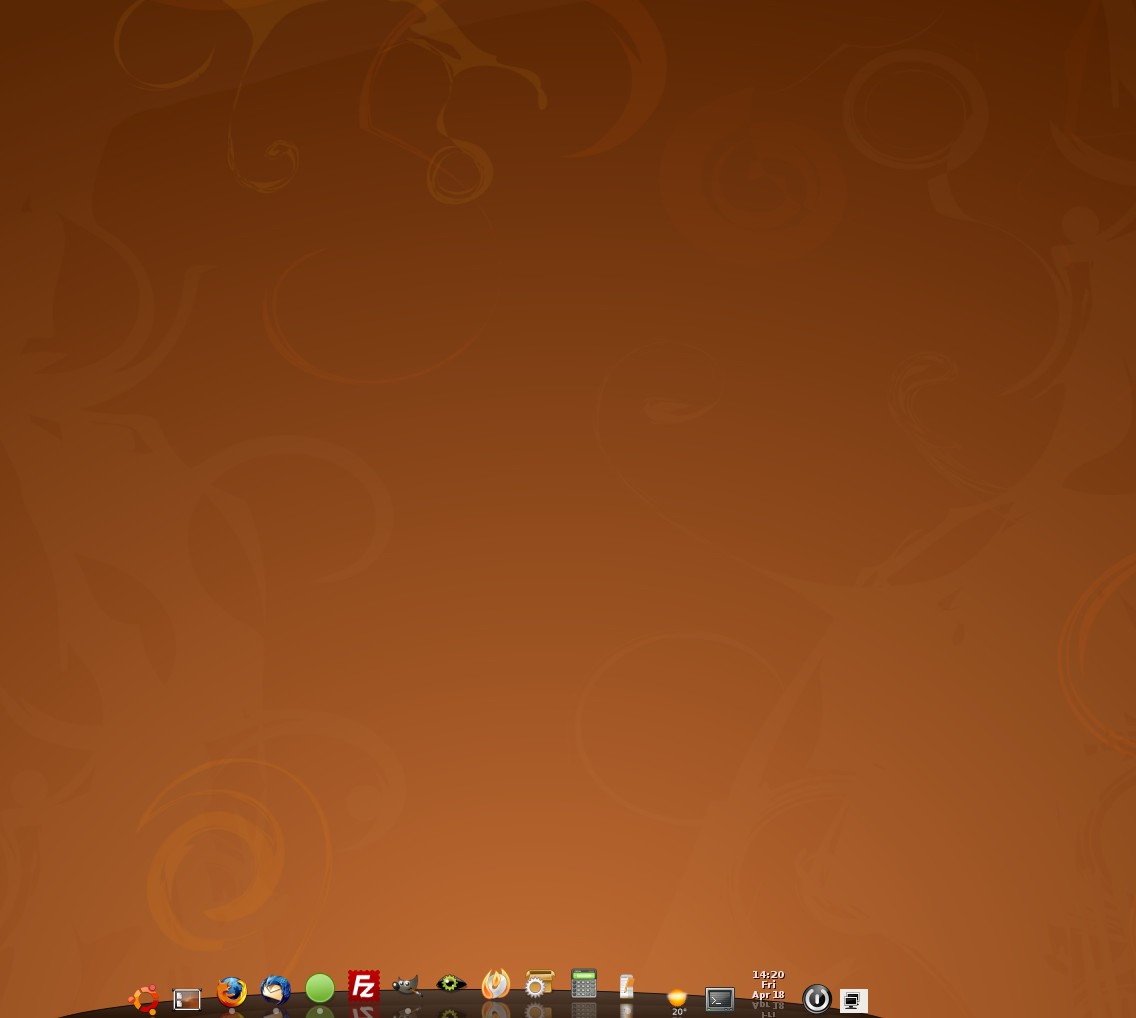
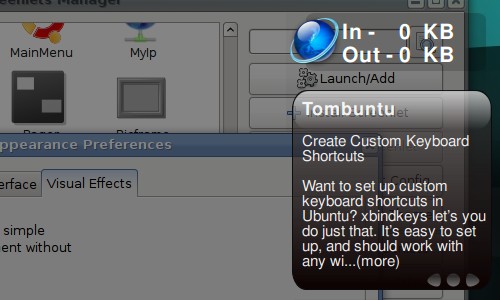
But first, a little history lesson about AWN. OK? Good... You should know that Avant Window Navigator, also known as AWN, is a dock-like bar which sits at the bottom of the screen. It has support for launchers, task lists, and third party applets. To get a better idea about what we are talking about here, take a look at the image in the left!
We have tried to make this guide as simple as possible, for every user to follow it and obtain a working AWN installation in the end.
Method 1 - The Easy Way
This is the easy method and recommend for all users!
Step 1 - Add the repositories
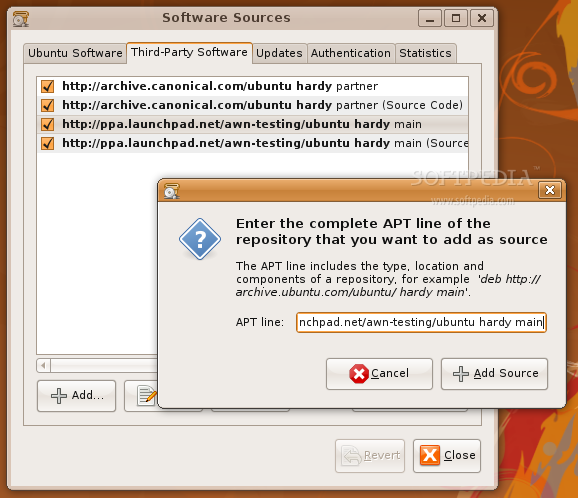
Go to System -> Administration -> Software Sources and enter your password when asked.
 |
A new window appears, click the second tab "Third-Party Software", then click the 'Add' button and paste the following lines (one by one):
CODE
deb http://ppa.launchpad.net/awn-testing/ubuntu hardy main
deb-src http://ppa.launchpad.net/awn-testing/ubuntu hardy main
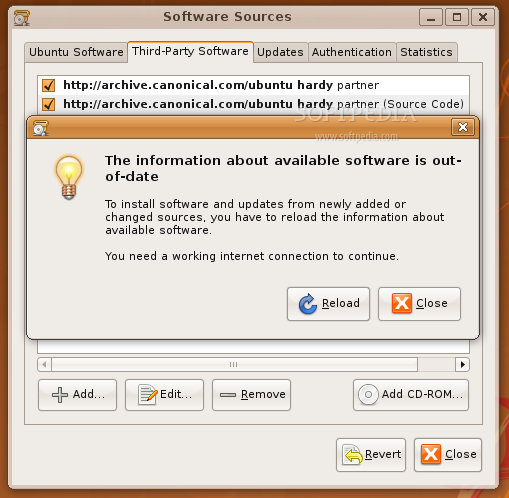
Now click the 'Close' button of the main window. It will ask if you want to reload the information about available software. Click 'Reload' and wait for the Software Sources window to close.
Step 2 - Install AWNOpen a terminal (
Applications -> Accessories -> Terminal) and paste the following command:
CODE
sudo apt-get install awn-manager-trunk awn-extras-applets-trunk
Hit the "Y" key when asked, and complete the installation. Close the terminal window and start the AWN dock from
Applications -> Accessories -> Avant Window Navigator.
WARNING: Be aware that AWN will appear over your bottom GNOME panel, therefore you should delete the panel before launching AWN! See the third tip from the "Bonus tweaks" section below.Method 2 - The Hard WayFor an easy reading, I will break this method in three big steps: Installing Dependencies, AWN Compilation, AWN Applets Compilation! Let's begin, shall we?
Step 1 - Installing necessary dependenciesOpen a terminal (
Applications -> Accessories -> Terminal) and paste the following code:
CODE
sudo apt-get install gnome-common automake build-essential gtk-doc-tools libglib2.0-dev python2.5-dev bzr python-gtk2-dev python-cairo-dev libglade2-dev libdbus-glib-1-dev libgnome-desktop-dev libgnome-dev libgsf-gnome-1-dev libwnck-dev libsexy-dev libnotify-dev librsvg2-dev libgnome-menu-dev libgtop2-dev libvte-dev python-alsaaudio python-feedparser python-gnome2-extras-dev
Enter your password and hit the "Y" key when asked. Close the terminal when everything was successfully installed.
Step 2 - Compiling the AWN sourcesDownload
Avant Window Navigator from Softpedia, extract the archive by right clicking on it -> Extract Here. Open a terminal (
Applications -> Accessories -> Terminal) and go to the AWN folder with the "cd" command:
CODE
cd /path/to/awn/folder (e.g. /home/marius/Desktop/avant-window-navigator-0.2.6)
And paste the following command:
CODE
./autogen.sh --prefix=/usr && make
When the compilation is over, you must install Avant Window Navigator with the following command:
Close the terminal!
Step 3 - Compiling the AWN appletsAt this point, AWN is installed and functional. But, we will need some applets to make it more useful and powerful. Therefore, open a terminal (
Applications -> Accessories -> Terminal) and fetch the latest AWN applets with the following command:
CODE
bzr branch lp:awn-extras awn-extras
Wait a few minutes until the whole applets will download.
Now, "cd" to the
awn-extras directory, which should be located in your home folder (e.g. cd /home/marius/awn-extras), and paste the following command:
CODE
./autogen.sh --prefix=/usr && make
When the compilation is over, you must install the applets with the following command:
That's it! You can close the terminal now and start the AWN dock from
Applications -> Accessories -> Avant Window Navigator.
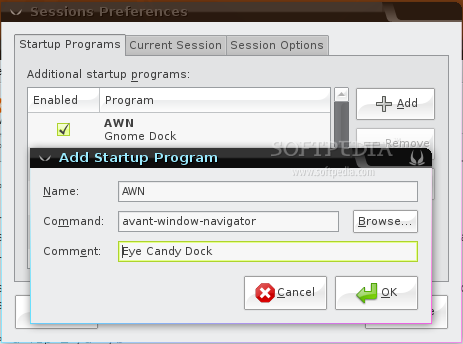
Bonus tweaksTip 1For the Avant Window Navigator to automatically appear every time you log-in, open the Sessions program (
System -> Preferences -> Sessions), on the "Startup Programs" tab click the 'Add' button and fill the fields like in the image below.
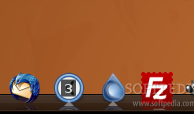
Tip 2In order to get the software shortcuts you need on the AWN dock, you can drag them from the GNOME panel or from your desktop, on it!
Also, from the AWN Manager (
System -> Preferences -> AWN Manager) you can add software shortcuts and the nice applets you've just installed!
Moreover, you can find some nice AWN themes
here.
Tip 3Next task is to get rid of those old GNOME panels!
ATTENTION: Before you delete the panels, remove all the applets and software shortcuts (look first at Tip 2 above) from them! It is extremely important to remove all the applets and let the panels "naked" for the AWN dock to perform properly!First, delete the alternative (bottom) GNOME panel, if you have one. Now comes the tricky part, because the remaining panel can't be deleted. So, go to
System -> Preferences -> Sessions and click the second tab, "Current Session". Click once on the
gnome-panel entry in that list and then hit the 'Remove' button to delete the last remaining panel. Then, click on the "Session Options" tab and check the '
Automatically remember running applications when logging out' option and hit the 'Remember currently running applications' button. Close the Sessions window and reboot the computer.
WARNING: The 'Automatically remember running applications when logging out' option from the Sessions tool will start all the programs you left open when you've logged out. Therefore, make sure to close the application you do NOT want to start every time you log-in!Tip 4Pidgin fans can install a nice plugin which will show their current status (away, busy, available, etc), it will display the number of unread messages and will alert about new messages.
First of all, make sure you have a Pidgin shortcut on your AWN dock (see Tip 2). Download the plugin from
here and extract the archive. Go in your home folder and hit the 'Ctrl+H' key combination to see the hidden folders and files. Enter the .purple directory and create a
plugins folder if it doesn't exist. Copy the
pidgin_awn.so file from the Pidgin AWN plugin's folder to the .purple/plugins directory. Now, open Pidgin, go to
Tools -> Plugins and check the 'AWN Plugin' entry. That's it! You will see that the Pidgin shortcut is changed (depending on your status) and when someone will send you messages it will look like this:
Tip 5Banshee fans can install a nice plugin which will display the cover art of the currently playing song, show the progress of the current song and offer play controls on the right-click context menu.
First of all, make sure you have a Banshee shortcut on your AWN dock (see Tip 2). Download the plugin from
here and extract the archive on your home folder. Open a terminal (
Applications -> Accessories -> Terminal) and paste the following commands:
CODE
sudo cp $HOME/banshee-awn-plugin/Banshee.Plugins.Awn.dll /usr/lib/banshee/Banshee.Plugins/
sudo chmod 644 /usr/lib/banshee/Banshee.Plugins/Banshee.Plugins.Awn.dll
Now, open Banshee, go to
Edit -> Plugins and check the 'Avant Window Navigator' entry. That's it! You will see that the Banshee shortcut will show the progress of the current song and the cover art (if you have).
Tip 6Special thanks to anon for this tipIf you want a curvy style of the AWN dock, open a terminal (
Applications -> Accessories -> Terminal) and paste the following command:
When the GConf Editor window appears, go to
apps -> avant-window-navigator -> bar (in the left side) and then, o the right side, set the -1 value to the first entry (bar_angle). That's it! AWN should change instantly and it should look like in the image below.
That's it folks! From now on, AWN should automatically start every time you log in and you can now enjoy a modern eye-candy Linux desktop!
Uninstalling AWNIf you installed AWN using the second method (from sources) and you want to uninstall it, open a terminal and paste the following commands (one by one):
CODE
sudo rm -f /usr/bin/awn*
sudo rm -f /usr/bin/avant*
sudo rm -rf /usr/lib/awn
sudo rm -f /usr/share/locale/*/LC_MESSAGES/avant-window-navigator.mo
sudo rm -f /usr/share/applications/avant*
sudo rm -f /usr/share/applications/awn*
sudo rm -rf /usr/share/avant-window-navigator
sudo rm -f /usr/lib/libawn*
sudo rm -rf /usr/include/libawn
sudo rm -f /usr/lib/libawn*
sudo rm -f /usr/lib/pkgconfig/awn.pc
sudo rm -rf /usr/share/awn-core-applets
sudo rm -rf /usr/lib/python2.5/site-packages/awn/
rm -rf ~/.config/awn
rm -rf ~/.gconf/apps/avant-window-navigator
Also, don't forget to remove the Avant Window Navigator entry from the Startup Programs list on the Sessions (
System -> Preferences -> Session) tool.
Read more...


 Never one to rest on their laurels, the Ubuntu team is hard at work on the next cutting edge version of their popular distro,